If you are working with Element 3D V2 in After Effects for your 3D workflow, you might want to bring in a 3D object built in Maya. To do this, you first need to export the Maya scene as an OBJ model. Simple enough, right? That'll only bring the Maya object into Element 3D as one big object with the same texture. Great if you just want to slap one material on an object and move a 3D After Effects camera around it, but not great if you want assign different materials to different parts of the 3D object, or want to animate individual parts separately.
If you want to have different materials on different parts of the object, you'll have to do some additional set-up work in Maya to assign different materials to different parts of the object. This way, Element 3D will read the different materials as markers for different parts of the object. You can then assign new materials to each part of the 3D model in Element 3D. By doing this, with a new feature of Element 3D V2, you can also create animation on each individual piece by using Auxiliary or AUX Channels. To learn how to import 3D objects from Maya into Element 3D V2, check out the video above.
New to Element 3D?
Start with How to create a 3D Logo with Shadows & Reflections!
Learn about the Top new Features of Element 3D V2!
Learn about how to use Cinema 4D Animations in Element 3D V2 in this video!
And my shortcut tips and tricks for Element 3D V2 in this video!
Want to Motion Track a 3D Object using Element 3D? Learn how in this video!
For a step-by-step breakdown of the process of bringing a Maya 3D Object into Element 3D V2, you first need to turn on OBJ export in the Maya plug-ins manager, which is in Windows > Settings/Preferences > Plug-ins Manager. You then want to scroll down and check on "OBJexport.Bundle"
Check 'em both on and hit REFRESH!
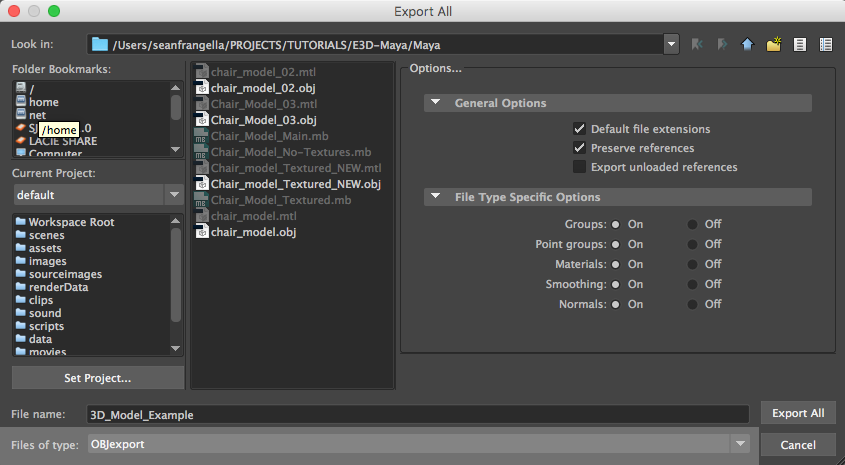
The next step is to export the Maya 3D Object as an OBJ, by going to File > Export all, and making sure you select "OBJexport" from the "Files of Type" drop-down.
Don't forget to change it to OBJ!
Next, back in After Effects, within the scene settings for Element 3D V2, you'll want to hit the Import button and locate the OBJ Model.
That is one slick chair.
This will bring in the 3D object as one big object and material. If you want to be able to assign different Element 3D V2 Materials to different parts of the object, you'll have to jump back over to Maya and do a bit of additional work. To allow Element 3D to read different parts of the 3D OBJ model as different materials, all you need to do is assign a new material to each piece of the object, by right clicking and selecting "Assign New Material."
Right-click like a champ.
It doesn't matter what color the material is, just that each part is a different material. I usually throw on a bunch of bright colors in Maya for reference, and end with a crazy rainbow colored 3D Model in Maya that looks something like this:
Wow, that is colorful!
This way, when you bring the 3D Object back into Element 3D V2 as an OBJ Model, each piece will be separate. This will allow you to assign new materials to each piece.
Colorful and shiny, and now usable in Element 3D!
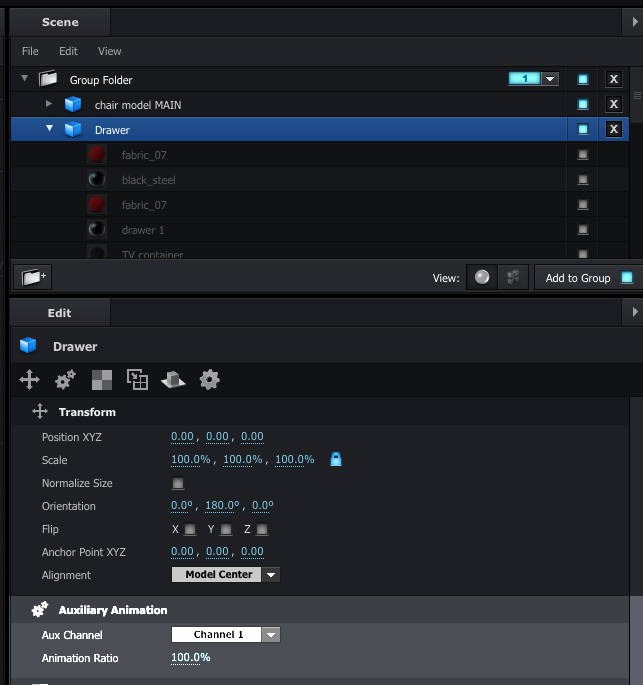
This process can also be used to animate each piece separately, by creating a duplicate of just one piece, and assigning it to an Auxiliary or AUX Channel. This setting is new to Element 3D V2, so be sure to update!
That is so many channels!
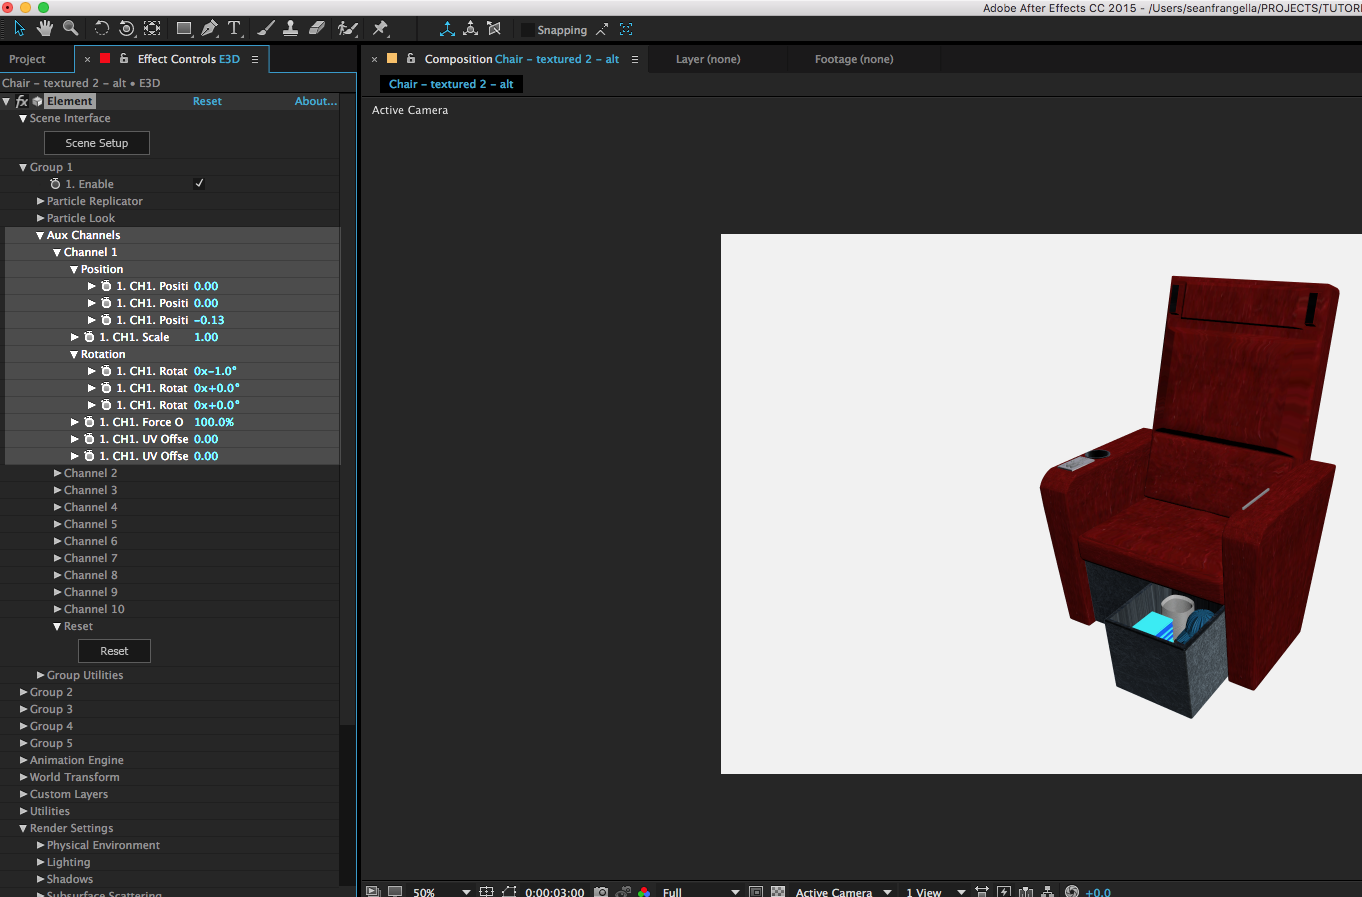
Then, after you've assigned different pieces to different AUX channels, you can animate position, scale, and rotation separately on the Element 3D effect, under Group > Aux Channels. This new system of groups with Aux channels massively grows the type of specific animation you can do in Element 3D V2.
So many animation possibilities!
Like this tutorial? Consider becoming a Patron at Patreon.com/SeanFrangella to get additional benefits such as project files and more!
To get weekly Motion Graphics, VFX, and 3D animation tutorials be sure to subscribe to the show on YouTube!
Looking for the next Tutorial to watch?
Check out the Top 5 Features of Element 3D V2 for After Effects!
Learn about the new 3D Character Creator app, Adobe Fuse!
Learn about the Top 5 new features of Cinema 4D R17!
Learn the Top 5 After Effects Expressions!
Learn how to Recreate the Agengers: Age of Ultron 3D Title Animation!
See how to Combine Element 3D with the new Saber Plug-in!
Learn about the Top 5 Hidden Features of Illustrator CC!
See how to bring Animated 3D Characters into Element 3D!
To check out new features added to Cinema 4D R16!
Check out the Top 5 Tips for Better Camera Animation in After Effects!


